How to send HTTP request when motion detected
The guide on this page is about to give you some basic information about how you can use your camera as a motion detector and create HTTP requests when it detects motion. The page provides a step by step guide, which shows the way how you can create an HTPP client, write a PH script that can handle the HTTP request and create a motion detector using your camera. So, let's get started right now.
Step 1 - Open Control Panel
The first step of the guide is to open the Control Panel application from the Ozeki desktop, where you can create various connection types to connect different applications and devices (Figure 1).

Step 2 - Create new connection
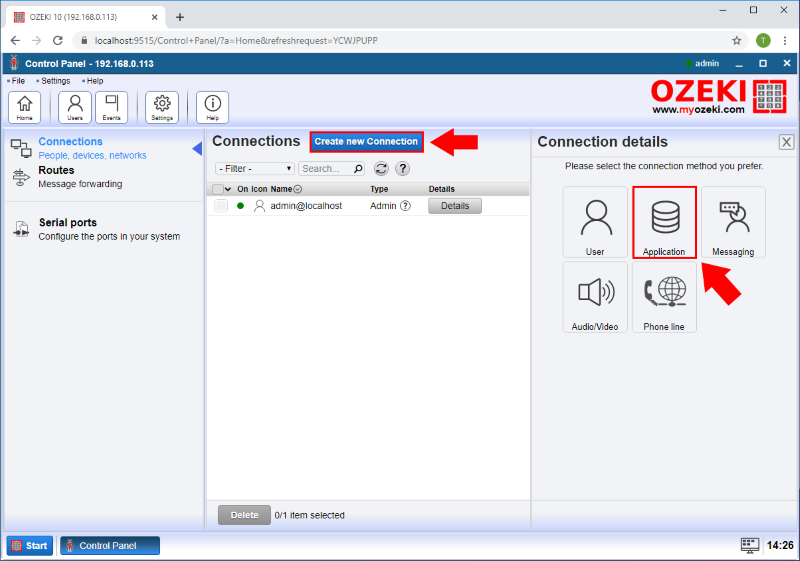
To create an HTTP client connection in Control Panel, you need to click on the Create new Connection button and then select the Application option (Figure 2).
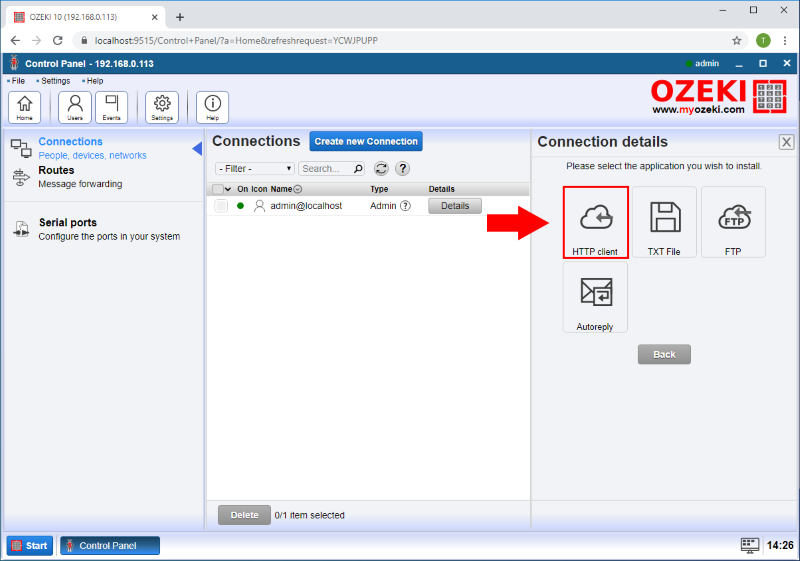
Here, in the Application menu, to create an HTTP client connection, you need to select the icon of the HTTP client by clicking on its icon as you can see in Figure 3.
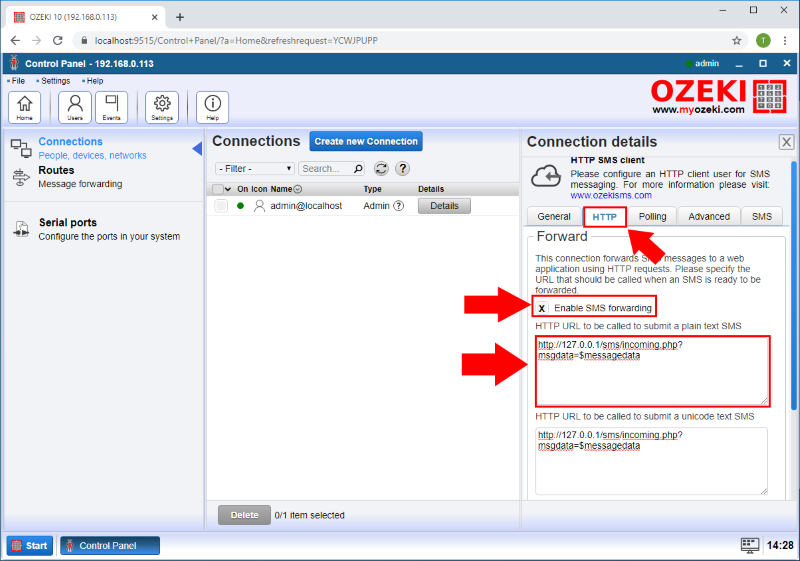
Before creating the HTTP client connection, you need to specify some details. For that, select the HTTP tab, and here, first, check the Enable SMS forwarding option. Then, enter the HTTP URL below as you can see it in Figure 4. This URL will call the incoming.php PHP script and send the message via the 'msgdata' parameter.
Step 3 - HTTP connection created
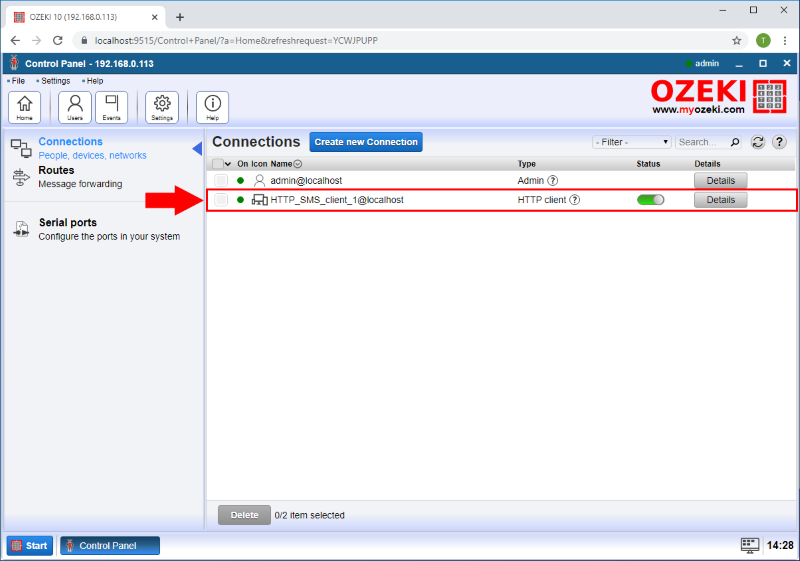
After you created the HTTP client connection, you will be able to see it in the list of connections in Control Panel application as Figure 5 demonstrates it.
Step 4 - Example PHP code
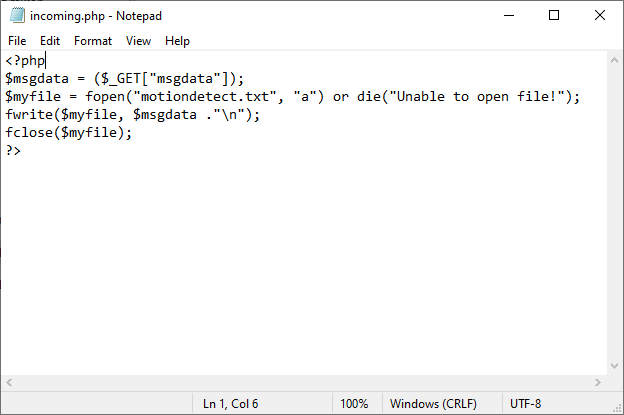
Next, you need to write a simple PHP script, that can handle the alert message from the HTTP request. Figure 6 shows a great example, that will store the message into a variable and then, it opens the 'motiondetect.txt' text file and appends the alert message into that file.
Step 5 - Open Camera Recorder
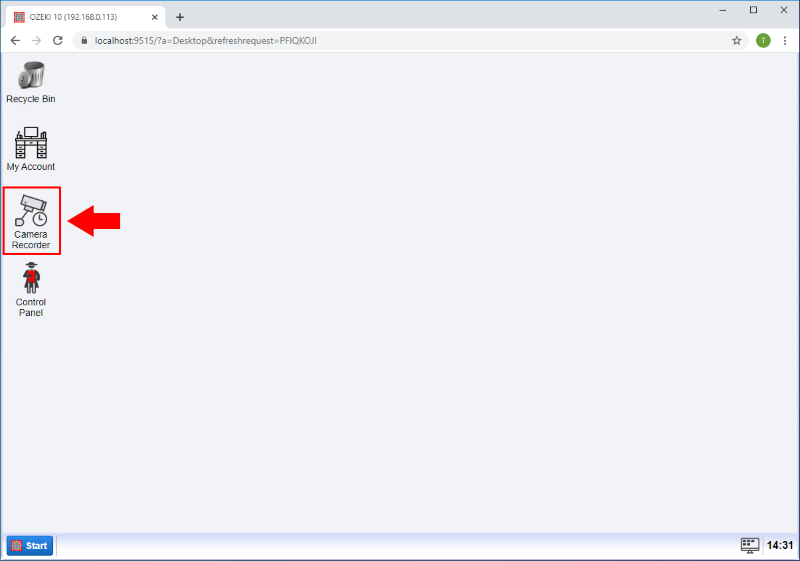
After you successfully created the HTTP client connection and the PHP script to send and handle HTTP requests, you need a motion detector. To create a motion detector open the Camera Recorder app from the desktop as you can see in Figure 7.
Step 6 - Create new camera connection
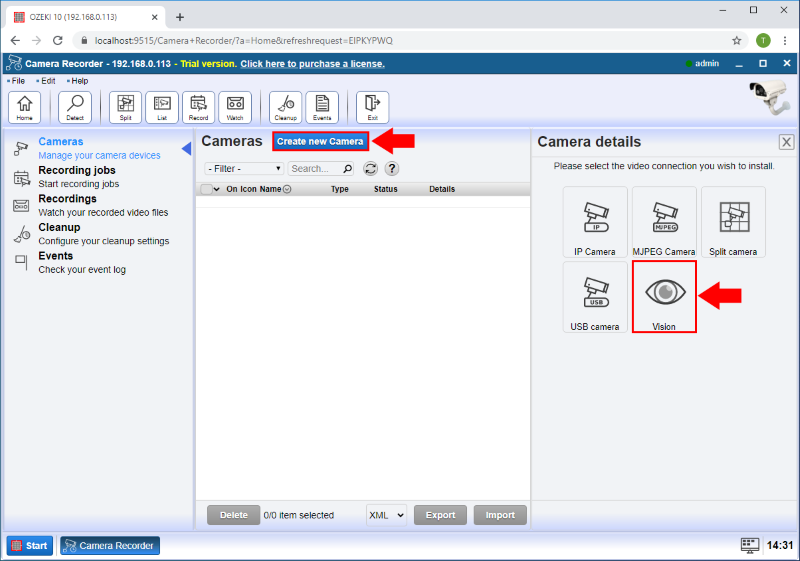
In the Camera Recorder application, to create the motion detection connection, first, click on Create new Camera, and from the available options, select the Vision as Figure 8 demonstrates it.
Step 7 - Create motion detector
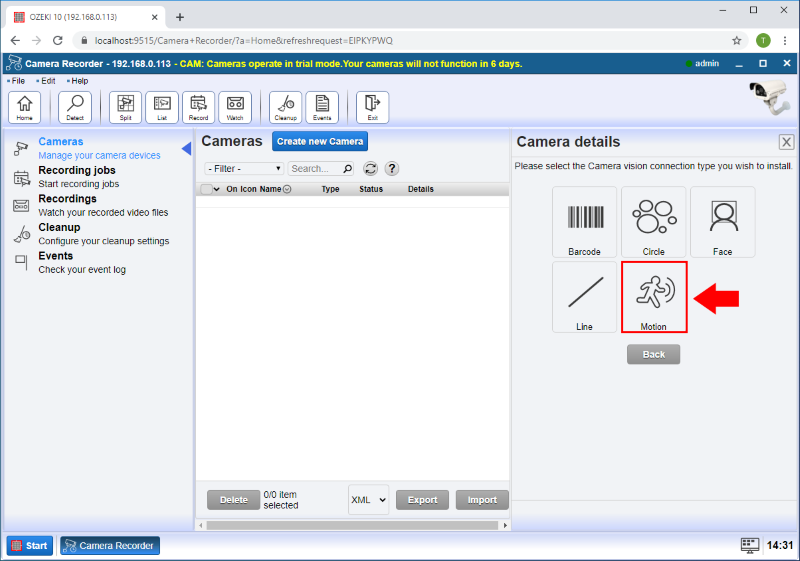
From the Vision type connections select the Motion connection to create a Motion detector (Figure 9).
Step 8 - Motion detector details
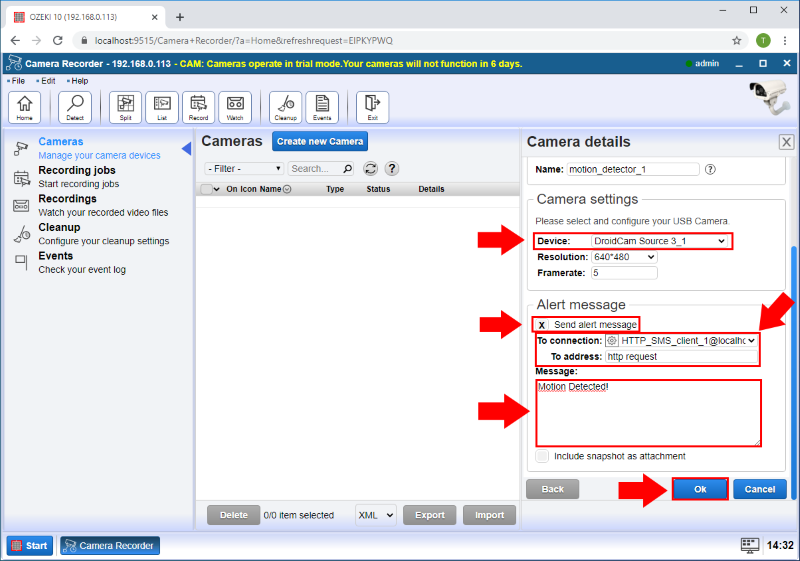
In the Camera Details menu, select the camera device you want to use and in the Alert section, check the "Send alert message" box. In the To connection section select the HTTP SMS client connection that you created before and then to the To address field, enter 'http request' that will ensure that the motion detector will trigger the HTTP client connection to establish an HTTP request. In the message box enter the message you want to send if the motion is detected. Finally, click on the OK button (Figure 10).
Step 9 - Motion detector created
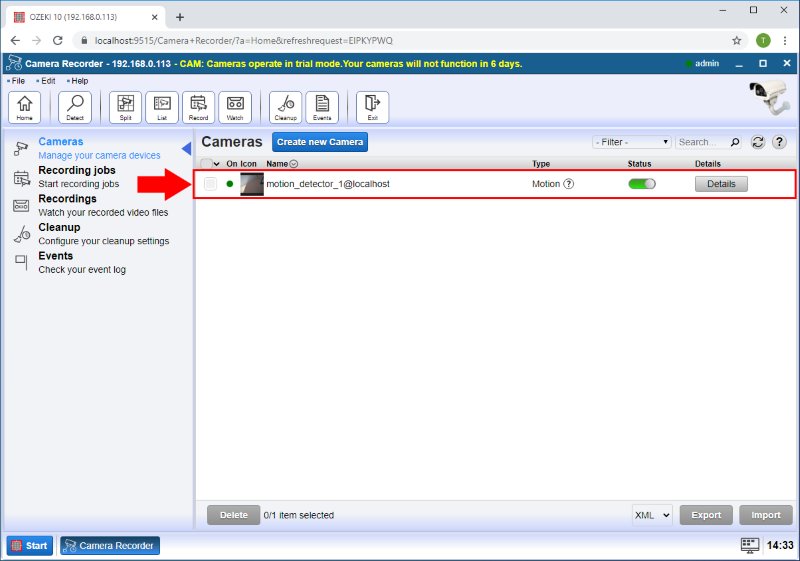
After you finished with that, you can see the motion detector is created as Figure 11 shows.
Step 10 - Motion detected
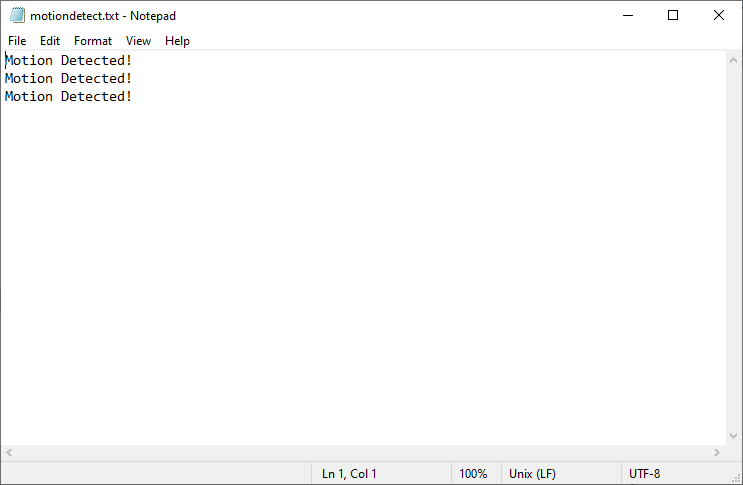
To test your motion detector camera, just make some movement in front of your camera, and if you have done everything right to this point, the detector created some HTTP requests. To check that, just open the 'motiondetect.txt' file (Figure 12), and if your motion detector works well, you will be able to see the alert messages in the text file.

 Sign in